
As software development becomes more complex and the need for automated testing increases, more and more developers are turning to tools like Playwright for test automation.
Playwright is an open-source, cross-browser testing library that allows developers to write automated tests in multiple programming languages.
In this article, we will explore how to get started with Playwright for test automation, a tool that enables reliable end-to-end testing for modern web apps. We will cover its features, the installation process, creating a new test project, writing and running tests, test reports, and some tips for maximizing the effectiveness of your Playwright tests.
Features
#anybrowser #anyplatform #oneapi #resilient #noflakytests #notradeoffs #nolimits #fullisolation #fastexecution #powerfultooling
Cross-browser – Pw supports all modern rendering engines, including Chromium, WebKit, and Firefox
Cross-platform – Windows, Linux, macOS, locally or on CI, headless or headed
Cross-language – use Pw in TypeScript, JavaScript, Python, .NET, or Java.
Test Mobile Web – native mobile emulation of google chrome for Android and mobile Safari.
Auto-wait: Pw waits for elements to be actionable prior to performing actions
Web-first assertions: Pw asserts are created for the dynamic web, so the checks are automatically retried until the necessary conditions are met.
Tracing – configure test retry strategy, capture execution trace, videos, and screenshots
Browser context – Pw creates a browser context for each test (equivalent to a brand new browser profile), delivering full test isolation.
Log in once – save the authentication state of the context and reuse it in all the tests, saving time but also delivering full isolation of independent tests
Codegen – generate tests by recording your actions and save them into any language
Pw Inspector – inspect page, generate selectors, step through the test execution, see click points, and explore logs
Trace viewer – capture all the info to investigate the test failure
Installing Playwright
Before you can get started with Playwright, you will need to install it. Playwright is available as an npm package, so you can easily install it using the following command:
npm init playwright@latest
Go through the following to get started:
- choose between TypeScript or JavaScript (default TS)
- name your tests folder (default is tests or e2e if you already have a tests folder in your project)
- add GitHub Actions workflow
- Install browsers (default is true) – can be done also manually

Done! Playwright will create the project structure.
Running tests
By default, the tests will run on all 3 browsers: Chromium, Firefox and Webkit using parallel workers.
These settings can be configured in the playwright.config file.
Tests are run in headless mode, meaning no browser will open up when running the tests. npx playwright test
npx playwright test
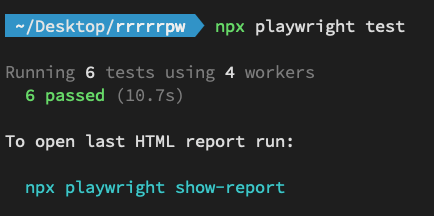
To run the tests in headed mode, simply add the --headed flag to the above command
npx playwright test --headed
HTML Test Reports
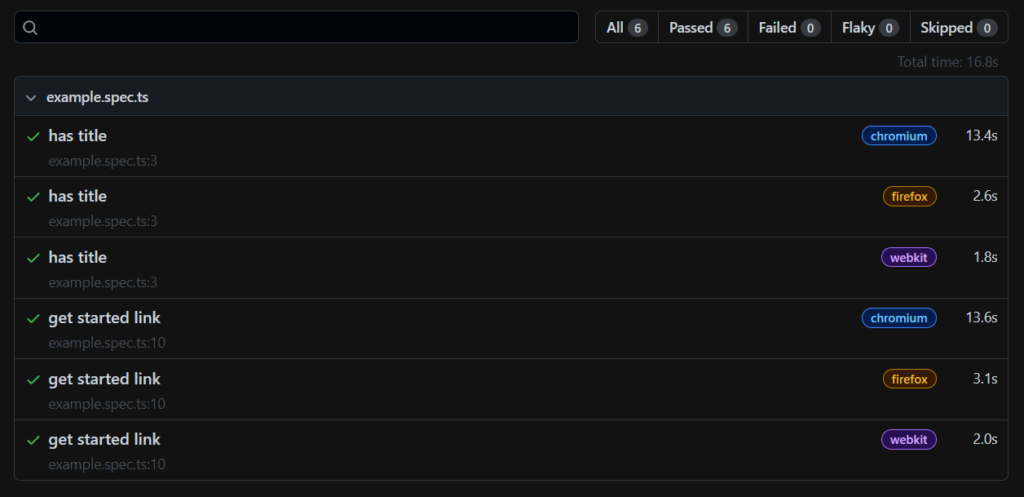
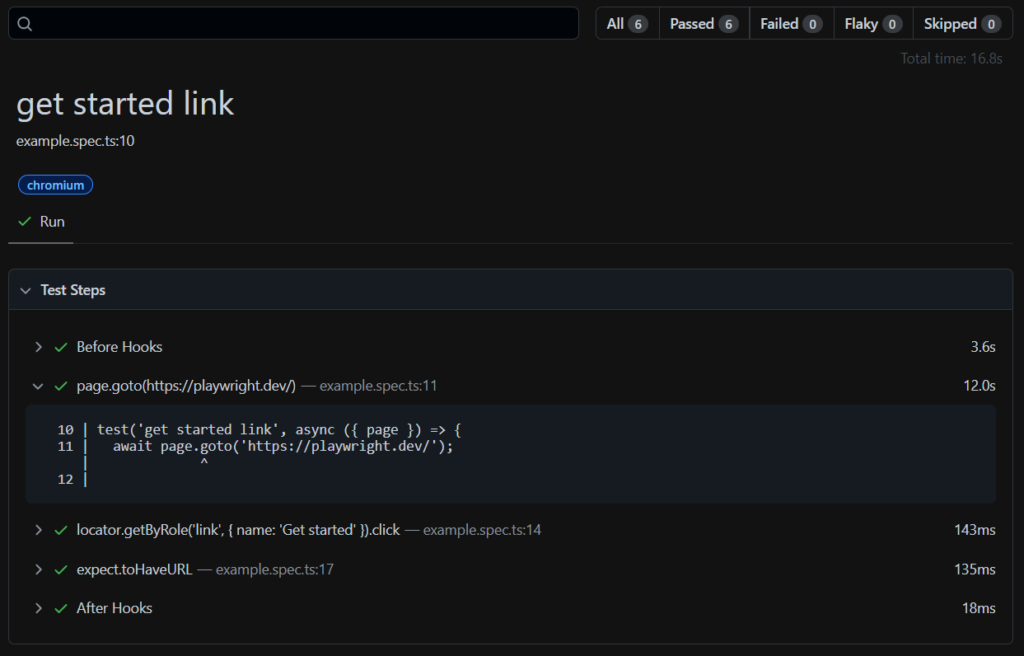
Once your test has finished running, an HTML report will have been created to show a full report, including the feature to filter the tests by browser, passed/failed/skpped status, and so on.
Note: by default the HTML is opened automatically if some of the tests failed.
Overview
Test scenario
Writing Tests
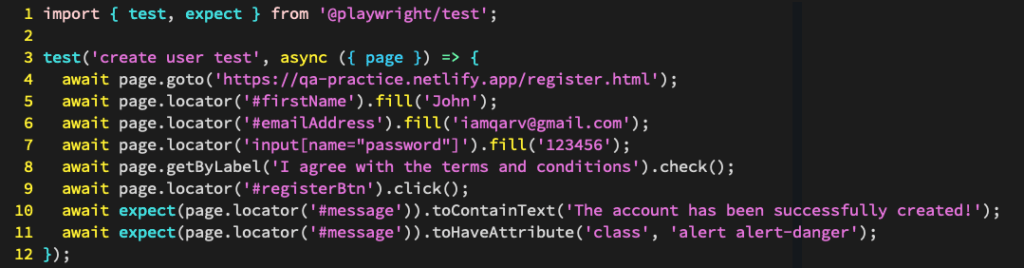
The Playwright API provides a set of functions that allow you to interact with web pages, simulate user actions, and assert that the application behaves as expected.
For example, here is a simple Playwright test written in JavaScript that navigates to a webpage and completes a registration form by providing the necessary details
Tips for maximizing the effectiveness of your playwright tests
To get the most out of your Playwright tests, here are some tips to keep in mind:
- Use page objects: Page objects are a design pattern that can help you organize and maintain your tests more effectively. A page object represents a web page and its associated functionality, and it can make it easier to write tests that are more readable and maintainable.
- Use selectors carefully: Selectors are a way to locate elements on a web page, but they can be brittle and prone to breaking if the page structure changes. Use selectors judiciously and try to choose selectors that are unlikely to change.
- Use await consistently: Playwright is built on top of promises, so it is important to use the await keyword consistently to avoid race conditions and other issues.
- Keep your tests short and focused: Try to write tests that focus on a specific aspect of the application and avoid testing too many things at once. This can help you write tests that are more reliable and easier to maintain.
Conclusion
Overall, Playwright is an excellent tool for automating web application testing, and it is definitely worth exploring if you are looking to improve your software development process. So go ahead and give it a try, and see how Playwright can help you take your testing to the next level!
Enjoyed this article? Make sure to subscribe to my YouTube Channel for more Test Automation tutorials, and follow me on LinkedIn and Twitter for regular insights.
Looking to improve your test automation skills?
I’ve created a personalized 1-on-1 Mentoring program refined to boost YOUR CURRENT skills. Reach out at iamrv@razvanvancea.ro for more details and together will create a learning path adapted to your skills and goals that you are aiming for, in a timely-efficient manner🚀